
How to Set Up Your First Email Sign-Up Pop-Up Using Klaviyo (No Stress, I Promise)
If you’ve got a website and you’re not collecting emails yet… what are you even doing? 😄 Just kidding (kind of). But seriously—growing your email list is one of the best things you can do to build a connection with your audience, and Klaviyo makes it super simple.
In this quick guide, I’ll walk you through setting up your very first email sign-up pop-up using Klaviyo. It’s easy, beginner-friendly, and won’t take more than 10–15 minutes. Let’s go! 👇
Step 1: Log in to Klaviyo and Head to Signup Forms
Once you're inside your Klaviyo dashboard, look to the left-hand menu and click on “Signup Forms.”

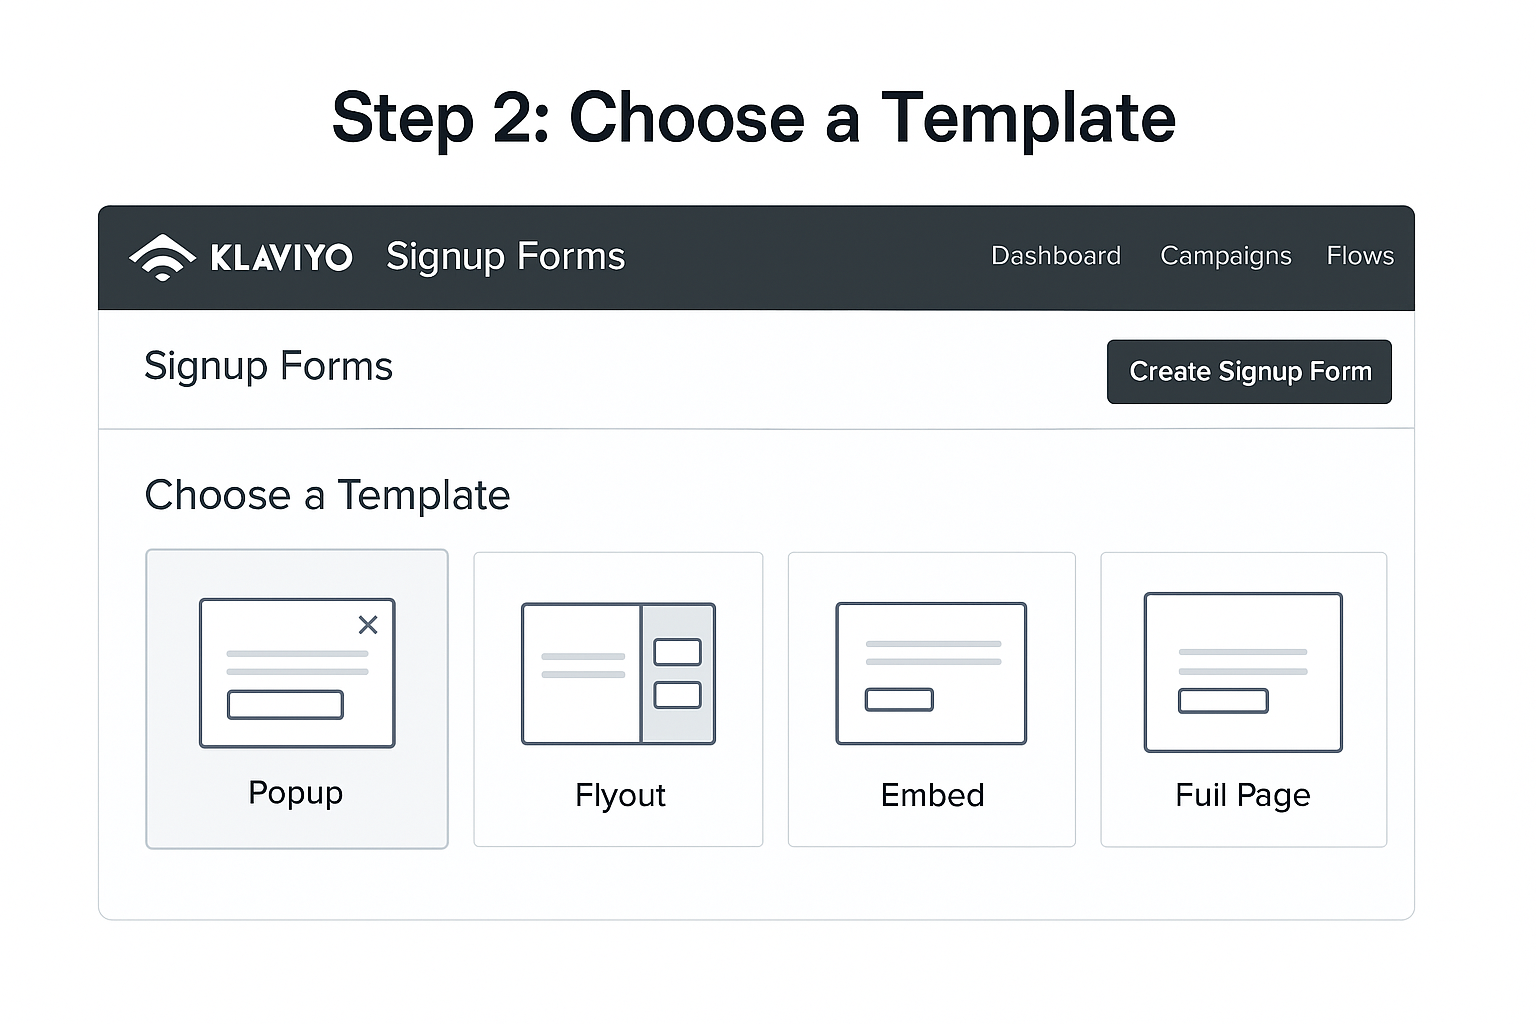
Step 2: Choose a Template
Click “Create Signup Form”, and you’ll be asked to pick a template. Klaviyo has a bunch of good-looking, pre-made options.
For this tutorial, let’s go with a “Popup” template since that’s what most people use to grow their list fast.
Once you select it, give your form a name like “Welcome Popup” and hit Create Form.
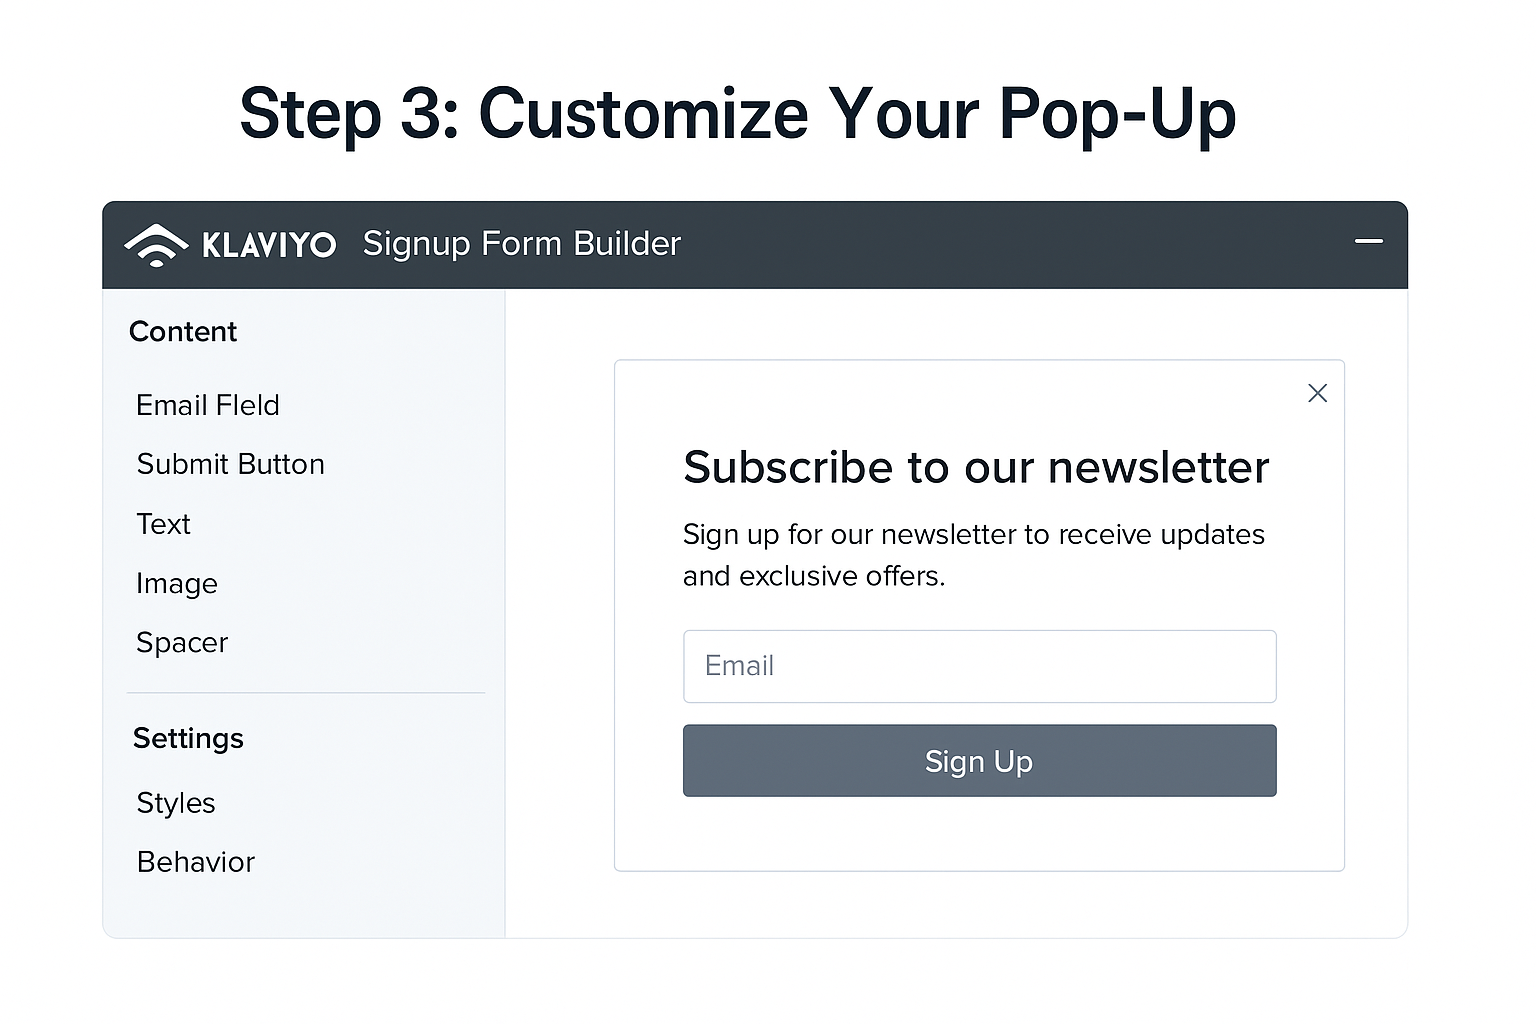
Step 3: Customize the Design
This is the fun part. You can:
- Change the text (e.g., “Get 10% Off Your First Order!”)
- Add a description or incentive
- Adjust fonts, colors, and images to match your brand
- Decide what info you want to collect (usually just name + email)
Make sure to update the Submit Button to something inviting like “Join Now” or “Get My Discount.”
⚠️ Pro Tip: Don’t make your form too long. More fields = fewer signups.
Step 4: Set Display Settings
Click into the “Behaviors” tab to control when and how your popup appears.
- Show on Desktop & Mobile: ✅
- When to Show: After 5 seconds or when someone scrolls 30% down the page
- Limit Frequency: Maybe show once per day or only to new visitors
You can also choose to show the popup on specific pages only, which is handy if you’re running a special campaign.

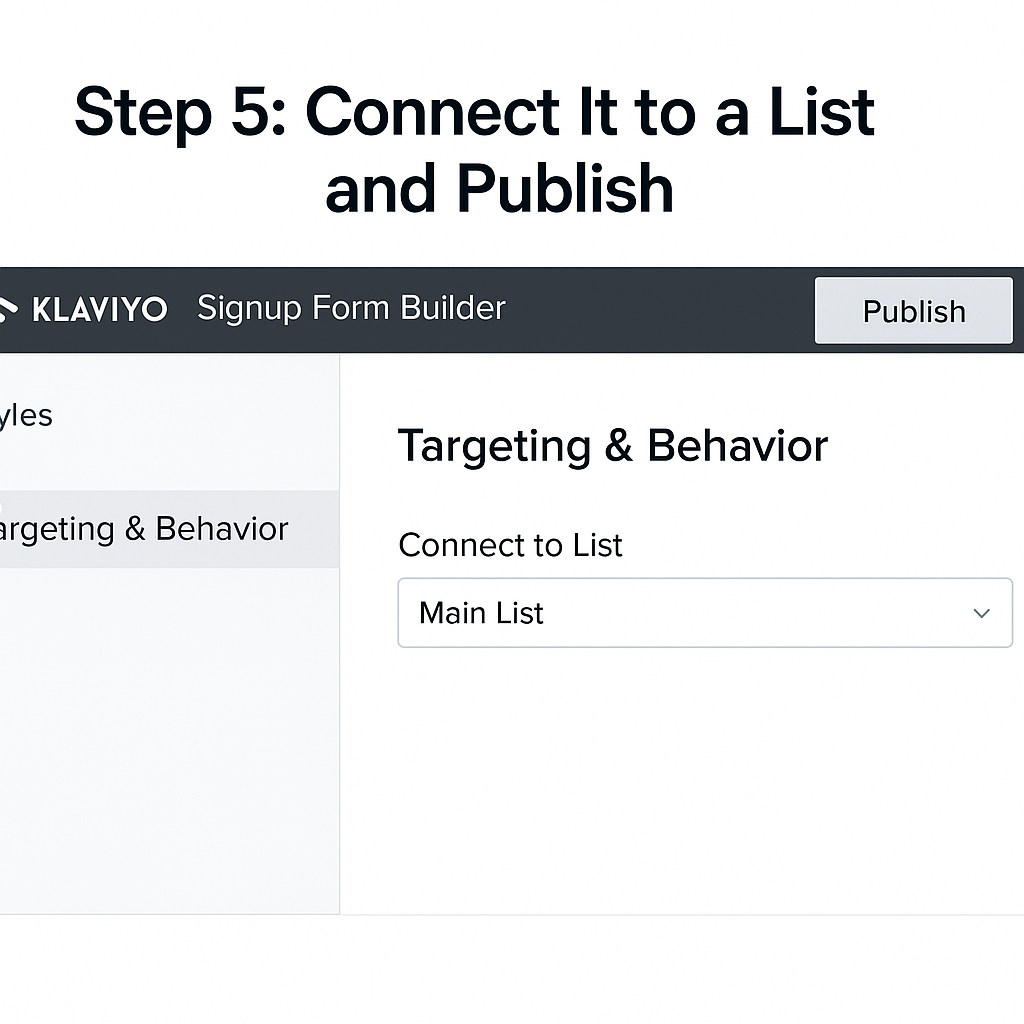
Step 5: Connect It to a List and Publish
Almost there! Under the “Targeting & Behavior” settings, scroll to where it says “Connect to List.”
Pick the list you want new subscribers to be added to (e.g., “Main List” or “Newsletter”).
Then click “Publish” in the top right corner.
Boom. 🎉 Your form is now live!
Bonus: Test It Out!
Visit your site in an incognito window to see the pop-up in action. Enter a fake email to make sure it works and ends up in the right list.
That’s a Wrap!
Setting up your first email pop-up doesn’t have to be scary or technical. With Klaviyo, it’s basically drag, drop, and done.
If you want to go next-level, you can also set up an automated welcome email to send right after someone joins. But we’ll save that for another post 😉
Got stuck somewhere? Drop your question or shoot me a DM—I got you.


